Filing 1099-NEC to the States
Updated: 01/05/2022 04:19 PM
This page will explain in detail what and how our new system works to file your '.src' file(s) to the states automatically and how you will receive a response stating whether the filing came back accepted or rejected by the state. Note that this system is completely separate from our process for submitting file(s) with multiple records/forms through the Combined Federal/State Filing program.
There are a few things about this process that you should know before starting.
- This process is completely automated and has no interactions with 1099Express staff. If you have problems we can help, but we cannot do this process for you in anyway.
- We cannot file any state withholding to the states. Any form within a file you upload with state withholding will be removed from the file when we are validating it on our system to go to the states. You will receive an 'Approval' message for this before you can continue the process to make sure you understand that these records are your responsibility to file.
- Once your files have been sent to the states, if any corrections need to be made, you must contact the specific states directly for making those corrections. Any attempt to make a correction through this system could result in duplicate filings at the state level. The only time that a file or state should be resubmitted through this system is if you receive an email form us stating that your file was rejected by the state (See the section on 'Receiving your Response from the State').
Sending your 1099-NEC ('.src') file(s) to the states
- Upload your 1099-NEC file(s) ('.src'). For more information on uploading through the program.
- On the 'Data Entry' page, make sure to select 'E-Filing NEC to States'.
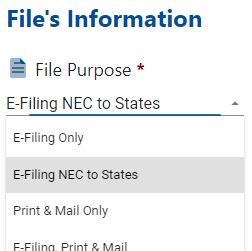
- If this is not an option, this means that at least 1 of your files that you uploaded were not a 1099-NEC form type.
- Once you have selected 'E-Filing NEC to States', you will see blue button that says validate.
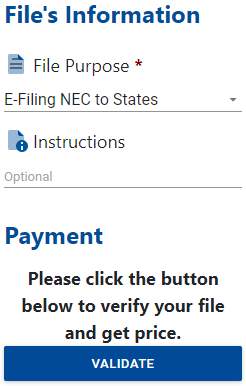
- This 'Validate' button is used to 'Submit' the action of selecting the option of 'E-Filing NEC to States'. This gives you an opportunity to change your mind and select a different purpose for your file. Once the validate button is selected, this upload will only be for this purpose and cannot be changed. You can always start over if you see a mistake even after pushing this button.
- Once you have clicked the 'Validate' button, our server will prepare your file for submission to the states and validate that everything in your file is correct for the states.
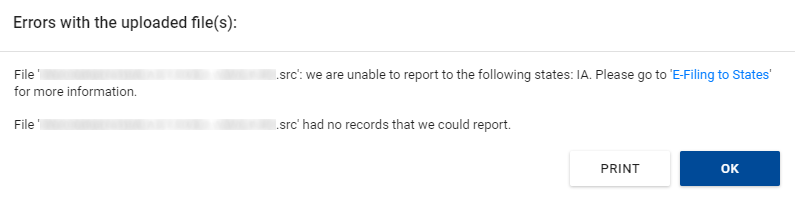
- If an error or errors are found during the validation process, you will be notified immediately with a list of all errors that were found. All errors must be fixed before the given file(s) can be submitted to the states. There is no bypassing this part of the system even on our end. Depending on your errors, different messages will appear as shown below. We recommend printing these errors to a PDF or on normal paper and then going through and fixing them after closing out of the upload process by clicking the 'OK' button.
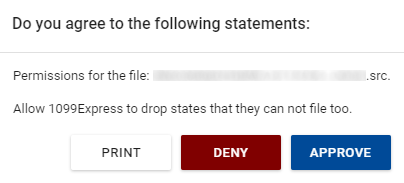
- When all errors have been fixed or if no errors showed, you should receive a message asking for your permission for different actions that we will need to do to get your file processed through to the given states. These messages will vary depending on what states you have in your file. Read through all of these messages and print the messages for your record.
- Once you have read and agree to the actions listed, click the 'Approve' button.
- If you do not agree to one or more of these actions, please click 'Deny'. You will need to then contact each state that you are required to file to and submit the information on your own. Some/most states should accept the IRS Pub. 1220 format which our program exports, however, this depends on the state you are filing to and you will need to get clarification from them on how to file directly to them.
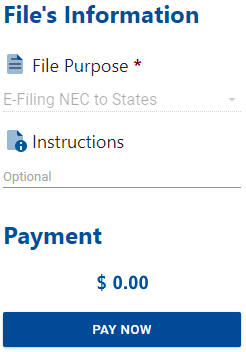
- Now that the 'Approve' button has been clicked, you will now be displayed a price above the 'Pay Now' button. Notice that the purpose is greyed out and cannot be changed. At this point, you will be given a price for this upload. Note that instructions here are ignored by the system since this process is completely automated.
- Click the 'Pay Now' button and you will be taken to our payment page. Because this process is automated, you cannot pre-pay or request invoicing for this process in anyway.
- Once you have entered your Credit Card/E-Check information and pay, you will receive a confirmation page. We highly recommend that you print this page out for your records. The confirmation number given will be used to reference which file(s) were accepted or rejected by the states. You should also receive an email with this information and a copy of your paid invoice attached.
Receiving your response from the state
The response from the state can take a while to process. During the last week of January, you may not receive your response until after the 31st as the automated system prioritizes processing the files to the states over the response. We have seen states like PA not give a response for a filing for multiple weeks. Note that our system to avoid busy hours, will process and send all state responses via email only (to the email that was entered at the time of upload) at 2:00 AM Central Standard Time (this is known as the system response period).
Rejection responses will be sent during the system response period directly following the rejection for that given state.
Approval responses will only be sent once all states have returned a response to your filing. This response can take a while to finish as it depends on the speed of the state(s) to process your filing. Once this email is received, that specific filing is completed unless a state rejected a filing. Rejected states will also display on this final email.
What to do if a state rejected your filing
If you receive a state rejection notice from us, this means you will need to re-submit that file for that state only. To do this, you need to make sure to save a copy of your original '.src' file. Then once you have made the copy, remove all records/forms that are not for the given state that rejected your filing. Fix any error that is stated with the rejection (most rejections come from missing or invalid state withholding number even if you have no state withholding with those records/forms). Now you need to follow the instruction to submit the new file that only contains the records/forms that were rejected. You will have to pay for these replacements again.
Correcting a record/form submitted through the system
We cannot submit corrections of any kind through this system. If you have a correction that needs to be made. You first need to make sure that that correction has been made to the IRS if necessary. Then you will need to contact the specific state that the correction needs to be made to so you can find out how they wish for you to make the correction.